Hi there! I’m Liz and I blog over at Liz on Call. I’m so excited to be one of the new contributors here at Reasons to Skip the Housework. Skipping the housework is one of my favorite things to do! At Liz on Call I share all things crafty, creative and delicious. I would love for you to follow along with me! But while you’re here, I’d love for you to check out this fun craft that is perfect to do with the kids.
Whenever we get together with my family on Sunday nights at my parent’s house, the kids are always wanting to do an activity. They will color and cut and glue and tape, you know, all those things kids love to do but sometimes we don’t love for them to do it. 🙂 So a few weeks ago, knowing my nephew would be asking about our activity, I thought it would be fun if we let the kids make this fun dyed pasta bracelet and necklace jewelry.

If you’re not sure how to dye pasta, you can find the tutorial here.

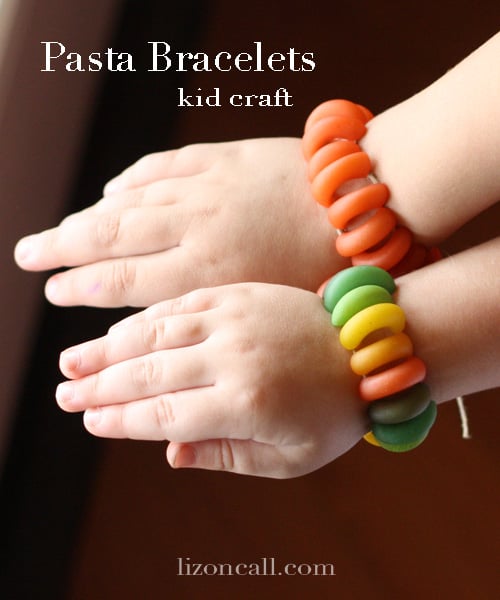
I made sure to take all the supplies we would need. I used some twine that I had and of course you will need your pasta. You really could use any type of pasta to make the necklace, but for this type of bracelet, we used the big elbow macaroni pasta.

This bracelet was a little too difficult for my kiddos to make, but an older kid would be able to make this bracelet. The first thing I did was cut a long piece of twine. Then I fed the ends of the twine into the ends of the pasta and pushed them through the pasta until they came out the other end and pulled the twine all the way through. Making sure that I tried to keep the twine even when pulling it through the pasta. Then I did the same thing for the next pasta. I pushed the two ends into the ends of the next pasta and pulled them through until the pasta was tight and right next to the first one. I continued adding pasta the same way, making sure as I went, the tops were all facing the same way.
Once I made it long enough, I tied the bracelet closed with a bow around their wrists.
The necklace was a lot easier for my kids to make.

I started out with another long piece of twine. I added one pasta and tied a knot around it to secure it. It made it a lot easier for the kids to start stringing on their own pasta. My son had a great time putting his necklace together. It was fun to see the difference in a 5 year old (who was very particular about what color came next) and a 3 year old (who strung on whatever color was in front of her). Once they were long enough, I just tied them off with a knot. I made sure they could slip them on and off right over their heads before I tied the knot.

My daughter was thrilled with her new jewelry and even my son liked it! Although he was very specific in having an all red bracelet. Either way, they were fun to make and turned out cute.
An all green necklace or bracelet would be perfect for St. Patrick’s Day!
Here are more last minute St. Patrick’s Day ideas to make with the kiddos:

Lucky Clover Marshmallow Treats
Thanks for skipping the housework with me today!
I’d love for you to keep in touch! You can keep up with all things Liz on Call at:
Happy Crafting!
Liz
